

If you have a toddler, you know they want to touch EVERYTHING. Curiosity is a strong motivator at this age and what better way to encourage this safely than with their very own, custom-made ‘Busy Board’!
The great thing about this DIY project is you get to pick and choose what you put on this board. Do you have a door stop at home they’re obsessed with? Put it on the board! Do they love things that make noise? Throw on some door knockers!
It’s also up to you how big or small you’d like to make it.
To begin you’ll need to choose a board, preferably a finished piece of wood, that you can cut to the size you prefer. We decided on a piece of #1-grade Birch plywood and cut it to a 1 ‘x 1’ piece. Just be sure to sand and smooth any rough edges!
Now we’re ready to get started.
Step 1 – Planning your layout
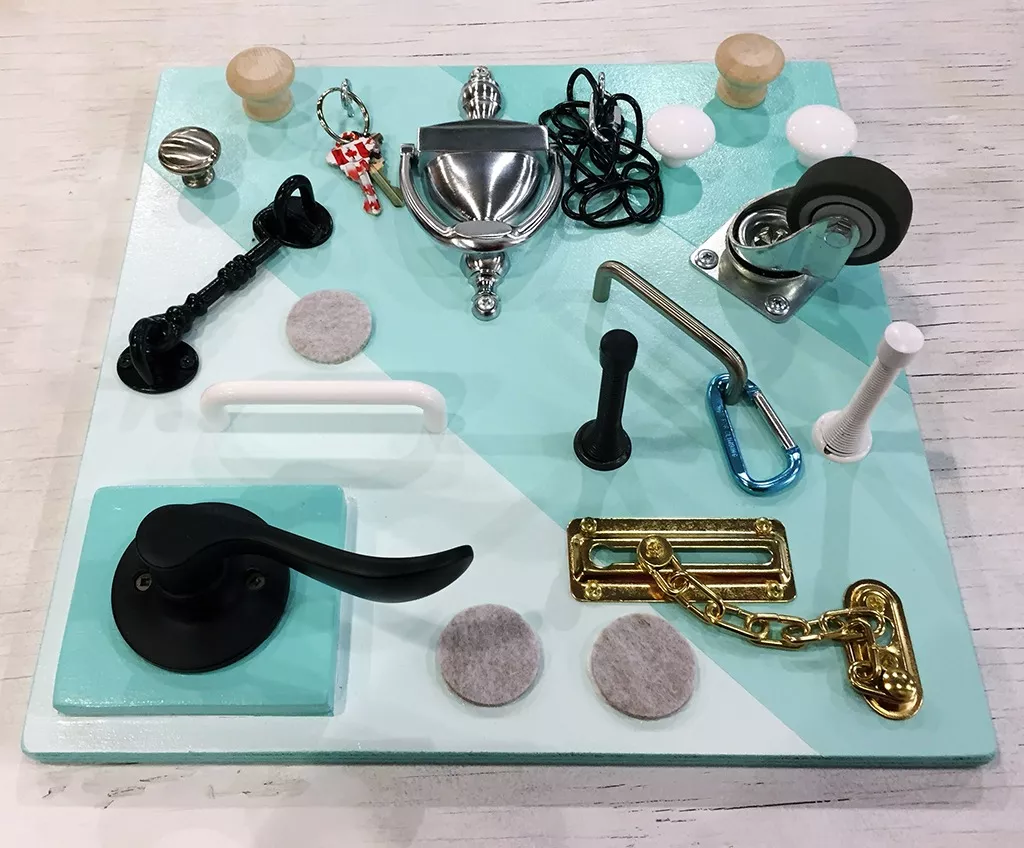
The first step is to choose the hardware pieces. Once we decided on the hardware we placed the objects on the board and made sure the placement worked (nothing was getting in the way of each other) and took a picture for future reference. We then marked the drill holes.


Step 2 – Drilling holes
Pre-drill your holes. Make sure your screws are not too long that they exit the back side of the board. If they are, replace with shorter screws when mounting the hardware.

Step 3 – Applying a colour scheme
Fill any holes, sand any rough edges and make sure the back and sides are free from any sharp edges. You may now paint (or stain) and decorate your board. This part is totally up to you! Just keep in mind who you’re making the board for and let that be your guide.


Step 4 – Mount hardware
Mount your hardware. Test all pieces to make sure they are secure and safe for little fingers and hands.

Step 5: Let’s Play!
Hand it over and enjoy watching the little one get busy!

